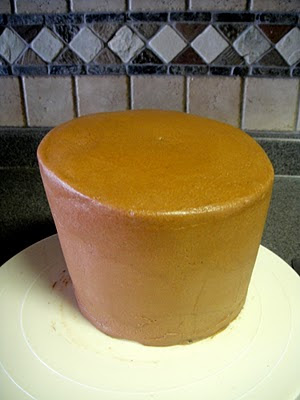
The idea of a topsy turvy cake is fun and intriguing. In this case, it is merely an optical illusion.
The first person I saw use this technique was B. Keith Ryder. It gives the impression of a Wonky Cake, but is actually quite level. It can be made and assembled before delivery without worrying about shifting.
The first person I saw use this technique was B. Keith Ryder. It gives the impression of a Wonky Cake, but is actually quite level. It can be made and assembled before delivery without worrying about shifting.
Janell's Cakes has a wonderful video demonstration of this style cake. You can see her construct it before your eyes on YouTube.
For this cake I decided to keep the angles less severe because of the geometric
design I was later using. However, for a more fanciful design, I would increase the angles and add more contour to the tiers for extra flair.
I started with my top tier using two 7" round layers and one 6";
and cut one 6" round pattern out of waxed paper for later use.
1. I chilled my layers well, filled and stacked them.
Flipping topside down ( for some reason, that is easier for me)
I contoured the tier with a serrated knife, cutting away the excess.
2. Attaching the cake circle with fresh frosting, I flipped the cake upright again...
3. and cut the top layer at an angle.
The more diagonal the cut, the more severe your angle on the cake will be.
I then iced the top and flipped the cut piece of cake
placing the thick side of the cut on the higher side of the layer, creating a steeper angle.
I then frosted the entire tier and chilled well.
For the bottom tier, I started with two 10" layers and one 9" layer, then followed steps 1-3.
this time crumbcoating the sides for easier handling.
(Sometimes you adjust as you learn!)
After centering the pattern and I cut around it, creating a level
surface;
then iced the tier and chilled well.
After chilling, I misted the tiers lightly with water
and covered with fondant.
I doweled the bottom tier using wooden dowels since I had them on hand, but you can also use
Because this cake had no topper, I didn't want to insert a center dowel
through the top of the cake.
So I pre-cut a 1/2" hole in the center of the 6" cake board .
I hammered through the center of the bottom tier, securing
into the cake board.
I placed the top tier over the dowel, securing the top tier to the bottom tier.
After that, the cake was ready to decorate!
Tutorial and photography by Jacque Benson
2011. All rights Reserved
This material may not be republished or reproduced in any manner without the expressed permission of the author.


