This is a tutorial for creating a Christmas Angel trio. They are fairly simple to make, but by adding artistic touches and your own creativity, you can make them as elaborate or as simple as you like.
This is a project that needs time to dry before finishing the last step, so be sure to allow plenty of time.
Either start in the morning and finish at the end of the day, or allow two days for the whole project.
You will need:
3 Waffle cones
1 bowl water
scissors
Fondant roller and board
white gumpaste
gum glue*
ball tools of various sizes
pastel pink and yellow non toxic pastel chalk
cotton swab
several artist brushes
toothpicks
#32 wire
* Gum Glue- add 1/4 tsp Tylose powder to 2 T hot water.
Directions:
Since the trio of angel will be staggered heights, you will want to shorten one cone by 1/2 inch and one by 1 inch. The easiest way to cut a cone is to place the end of the cone in a bowl of water 1/2 inch deep.
Allow to set for 10-15 seconds, then remove.
Using scissors, carefully cut softened cone over a paper towel .
For one inch cut, you will have to repeat this process twice.
Set upright on paper towel to dry.
Be sure your cut is level.
Now you have the foundation for your angel trio.
Form a one inch square of gumpaste.
Dampen lightly the end of cone with gum glue.
Place the square of gumpaste one the pointed end of cone
and shape around cone as shown below, creating a waistline for angel.
Cut 4 triangles of gumpaste to the pattern shown.
Cover with plastic wrap to protect while working.
I started with the smallest angel, cutting four 3 inch triangles.
For, remaining angels, add 1/2 " to length.
Dampen waistline of angel with gum glue..
Add two triangles to sides of cone, as shown below
On the two remaining triangle, carefully roll back the sides about 1/4"
and brush with gumglue

Attach the folded triangles to the previously attached triangles to create skirt.
Press top of skirt into waistline to secure. |
|
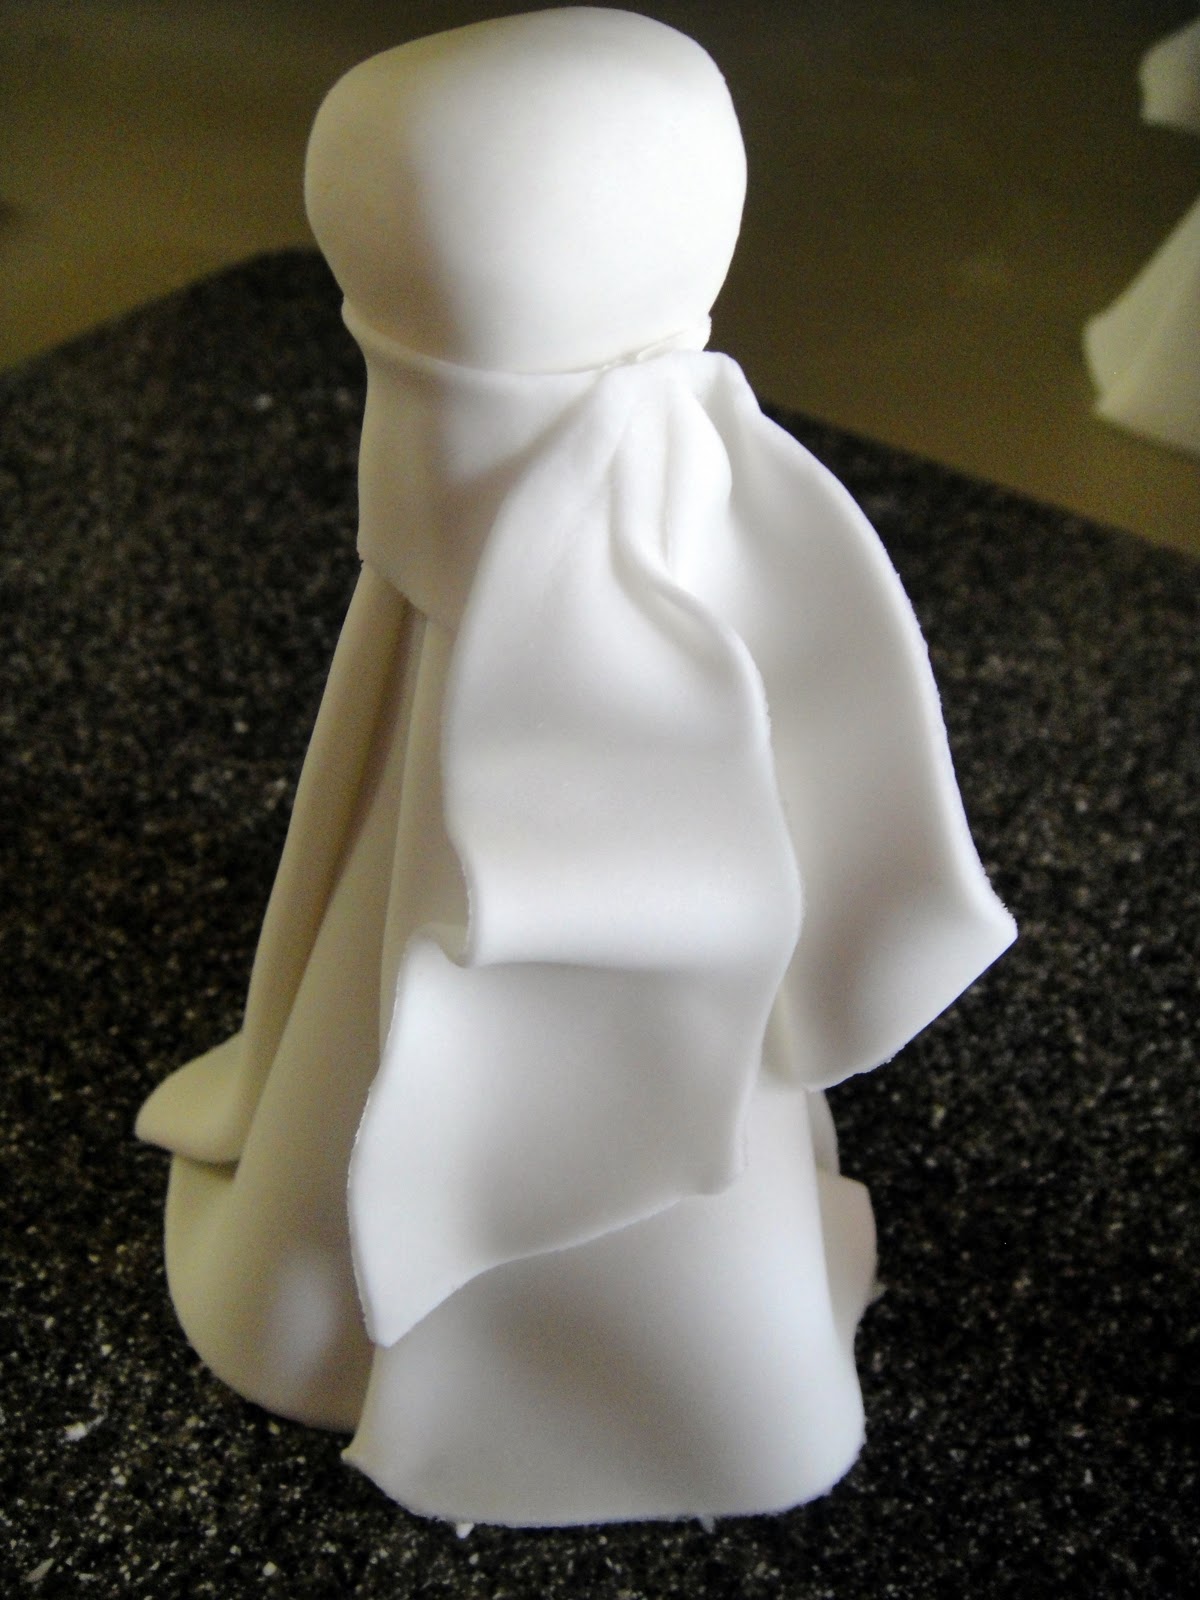
Roll out and cut a 1/2" strip to cover the waistline as a sash.
Secure to waistline with gumglue
Roll out and cut another strip about
5-6" in length and about 1/2" wide.
|
Cut wider at ends, as shown in photo.
Fold in half and attach to back side of waistline using gumglue.
To create movement, attach part of the sash to skirt
at various points using gumglue.
Roll out and cut a 1"x 3/4" rectangle square and a 1/4"x 3/4"
strip.
Fold the 1" at the center to create bow, and wrap
the 1/4" strip around the center, cutting excess and securing with gumglue.
Attach to the back of angel at waistline, using gumglue.
For sleeves, roll out a 1/2" roll of gumpaste about 2-1/2" long.
Narrow the center of the roll, by pressing and rolling in the center, narrowing and
elongating the roll.
When the roll is narrowed as shown below, press the ball tool
into the end of the roll to hollow slightly.
Shape ends of roll into a bell, by thinning and ruffling the
edges using the ball tool.
When finished, press the end of a smaller ball tool (1/4")
into the hollow of the sleeve to create an indention
for attaching the arm of angel.
Dampen the top of bust of angel with gumglue and
press the center of the sleeves over bust to secure, as shown below.
Roll out 1/4" x 1" lengths of gumpaste.
Press on end to flatten for hand.
Cut 4 slits for fingers and gently roll, using hands,
into round fingers and thumb.
Roll and cut a 3/4" circle. This does not need to be precise. Thin and ruffle edges of circle with a ball tool, as shown below. This is the ruffled collar.
Attach the collar to top of bust and insert the
arms into the sleeves using gumglue.
The arms can be a bit tricky sometimes, so be patient and
hold to sleeve until they are secure.
Roll out a ball of gumpaste. Dust with cornstarch, them press firmly
into face mold. I used a young girl face mold for my two shortest angels, and
a woman's face mold for the tallest angel.
The face below is the woman's face mold.
Paint the faces carefully immediately after removing from mold.
I find it is easier to apply color to the face while the gumpaste is still supple.
Paint lips using the pink edible marker. ( This is the girl's face)
Rub the cotton swab over pink pastel chalk
and brush gently over cheeks.
Using the blue and brown edible markers, create the eyes and eyelashes.
Dip a toothpick into white Americolor gel and place highlights in the eyes.
Dampen the bottom of the neck with gumglue and smooth
into the body using the ball tool.
Make a 1/2" ball for each wing.
Press into the mold , then place the two sides of mold
together and press firmly and evenly.
Open mold and remove wing. Cut off any excess from the edges.
Place on a foam pad to firm.
When firm enough to handle, dampen the back of angel with gumglue
and press the wing, securing the center by pressing and smoothing with the ball tool.
Set a styrofoam cone on end to secure the wings
or lay angel over a bowl until wings are secure.
Repeat the process with the remaining two angels.
Set aside to fully dry.
***
After the angels are fully dried, then you can apply the hair.
Using a little of the yellow pastel chalk, color a small amount of gumpaste (about a 2-3 " ball ) for the angels' hair.
The yellow is quite pale, almost white.
Press through a clay gun using the disc with the multiple small holes.
Cut off desired length, then roll the edges to curl using the toothpick.
Moisten the entire head with gumglue and attach the hair, beginning at the back of the head and moving forward.
When finished, sprinkle hair with rainbow disco dust to create
"heavenly" glow.
Cut the #32 wire about 3" long and shape into a circle,
Twisting to secure and leaving a 1/2" extension.
Brush the circle generously with gumglue and dip into
rainbow disco dust to create the halo.
Insert the extension of wire into hair.
I finished angel by dry dusting using luster dusts. When dry dusting, touch the end of the brush into the dry luster dust and tap off excess dust before applying to your gumpaste.
Dry brush the angel's gown using the ultra white sparkle luster dust using a 1/2 flat brush,
the dry brush the wings with gold shimmer dust.
Place the final touches on the angel by dry dusting the edges of the wings and sleeves
with gold highlighter luster dust.
________________________________________________________________
To all our Friends who visit us weekly, we wish you
a wonderful and blessed holiday season.
"And suddenly there was with the angel a multitude of the heavenly host praising God and saying:
'Glory to God in the highest,
And on earth peace, goodwill toward men!"
Luke 2:9-14
Tutorial by Jacque Benson
All Rights Reserved 2010
This material may not be republished or reproduced in any manner without the expressed permission of the author.