I know that most of you experienced decorators out there now how and why you should cover your cake boards, so this is for the decorators that are just starting out.
I see many cakes that are being used with the cardboard disks that are not covered or are covered in tin foil. Uncovered boards will get greasy and flimsy. Foil covered boards will tear when the cake is cut and really doesn't look that attractive. Here's just one way that I do mine.
I use different board types depending on what I want to do and the look I want to achieve. I have used the cardboard cake rounds, foam board* (my favorite!), particle board that I have my neighbor cut for me, and the heavy precut rounds or square wood from the hardware store. But no matter which one I use, they are always covered with contact paper to protect the boards and to keep them from getting yucky. You can also use Wilton Fancy Foil, plastic wrap, press and seal wrap, but I have found that none of them hold up as well as contact paper.
A little info about using contact paper.....always use the white or the clear contact paper. Using contact paper with colors or dyes in them can be unsafe. If you wish to be creative with your cake board, you can always use some kind of fun paper or gift wrap on the board, but always cover it with the clear contact paper.
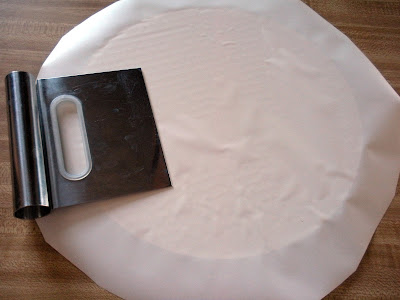
First, start by measuring how much contact paper you need. I just place a circle or square on the contact paper and cut it out a few inches larger.
For a round, cut off each corner to make a circle.
Flip it over and with a bench scrapper, smooth out the bubbles that have formed on the top side of the board.
Flip it back over and cut slits with scissors all the way around the board.
Starting at one end, start folding the cuts up to the bottom of the board, overlapping them a bit.
Finished board.
This picture shows one half inch foam board and as single cake circle. I used the thin one for under the cake. After it was iced, I attach it to the thicker foam board for more stability and this one was used for the base of the cake.
On this one, I used double sided tape to stick the cake to the base cake board. You can also use the tape runners that are used for scrapbooking.
At this point, you can either put an icing boarder around the base of the cake to hide the board that the cake is sitting on.
I covered the board that this cake is sitting on with Mame's modeling chocolate.
These leaves are also made from modeling chocolate and dusted with luster dust. The chocolate doesn't pick up the colors as well as fondant or gumpaste would though!
The leaves where used for a top border for the cake. Pumpkins were also cut out and used.
Now the most important part is to hide the contact paper creases. Double sided tape was used again around the bottom board. Then starting in the back of the cake, add some ribbon that will compliment the colors of your decorations.
Make sure you pay attention to the cake boards when you are looking around at cakes. They usually always have a finished look.
*Foam board can be purchased at most craft stores. Investing in a hot knife is also very useful, but the foam boards can be cut with a serrated knife. A hot knife cuts through the board like butter!!
~~~~~~~~~~~~~~~~~~~~~~~~~~~~~~~~~~~~~~~~~~~~~~~~~~~~~~~~~~~~~~
Here are some of the different techniques that I used:
Wall-E's board was 1/2 inch thick foam board covered with 12x12 inch scrapbook paper and then covered with clear contact paper.
This 1 inch wooden board with covered with contact paper, that was covered with fondant and embossed with patchwork cutters. The pattern was lightly dusted with luster dusts.
Square wooden board covered with contact paper, then fondant. A mixture of gel paste colors and corn syrup and water was brushed on the surface to give it a watery look.
This board was a heavy wooden board covered with contact paper and fondant. The lining technique can be found here.

Tutorial and Photography by Rhonda Christensen
All rights reserved- 2010
This material may not be republished or reproduced in any manner without the expressed permission of the author.

Tutorial and Photography by Rhonda Christensen
All rights reserved- 2010
This material may not be republished or reproduced in any manner without the expressed permission of the author.


