When you click on a page, scroll past this week's featured photo to view.

WELCOME!

This site is dedicated to sharing what we have learned with you! Enjoy our tutorials, and if you have a question please feel free to ask! I know one of our sugar enthusiasts will either know or try to find the answer.
We all have something to share...and we all have something to learn!


___________________________________________________________


Nothing says Irish like Beautiful Lace

Nothing says Irish like Beautiful Lace
Click on photo for Earlene Moore's tutorial for beautiful fondant lace and have fun with your next cake!


.............................................................................................................................

/////////////////////////////////////////////////////////////////
.............................................................................................................................


Monday, November 23, 2009

Autumn Maple leaf tutorial


Mame's Maple Leaf Instructions

Mame Recckio Wolfe-1/05/09


Maple Leaves:

1. Color gumpaste w/Ivory gel color
Ivory gumpaste takes Fall colors more naturally

2. Roll out gumpaste thin on flat side of CelBoard.

3. Lightly dust CelBoard with 50/50 Mix [Confectioners’ sugar/Cornstarch]

4. Cut out various sizes of Maple Leaves

5. Vein leaves using Maple/Grape leaf veiner

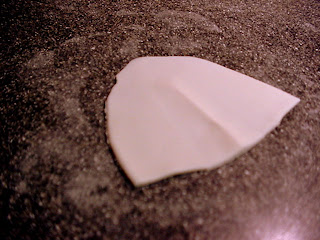
6. Using CelPin, soften edges – right side of leaf down

7. Slightly pinch along center vein

8. Place on gently crumbled foil squares to dry naturally

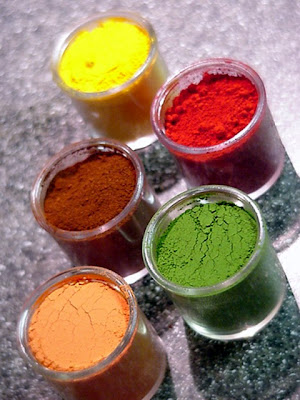
9. Dust in various Fall colors of petal dust [Brick/Golden/Kiwi/Pumpkin/Red]
Mame's Custom Made Petal Dusts


10. Steam

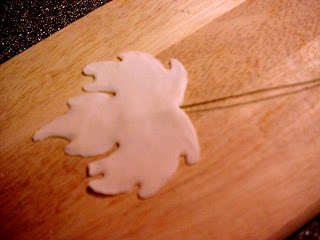
Leaves can also be wired
1. Follow above instructions but roll gumpaste out on grooved side of CelBoard
2. Turn board over
3. Lightly dust board

4. Place gumpaste on board and cut out Maple Leaf

5. Dip 26 gauge wire into gumpaste glue and insert into central vein

6. Vein with ridge-side up on veiner


7. Soften edges – vein side down
8. Allow to dry on foil squares
9. Cover wires with green or brown floral tape
10. Dust with petal dust
11. Steam


Mame's Autumn Leaves


Tutorial was created by Mame Recckio Wolfe-1/05/09-all rights reserved. This material may not be reproduced without the permission of the author.

Copy written © 2009 - Present Year Created by the author of the above work – Mame Recckio Wolfe

Monday, November 16, 2009

Let's Talk Turkey-- Cupcakes, that is.


I was recently asked to help a Brownie troup earn their "career badges". So these Brownies learned about cake decorating by creating thier own little turkey cupcakes. We all had loads of fun making these, but they didn't last long. As soon as the finishing touch was on, they asked permission to eat them. Below are the instructions to make your own turkey cupcakes.


Supplies Needed


White and Chocolate fondant

small amount of yellow fondant


Fondant roller/ board


3" Garret Frill Cutter (raise middle cutter)


1" frill cutter


Spatula


Toothpicks


dozen cupcakes


Chocolate Buttercream


Red and Yellow Buttercream


Piping Bags equipped with couplers


#14, #9 piping tips


Knead 2 parts white to 1 part chocolate fondant together, but do not fully incorporate colors.


Roll out to about 1/8" thick and using the frill cutters, cut out 6 large and 6 small.


Center the small cutout over the large, then cut in half, as shown, creating the tails.


Using side of spatula, make indentions over the tails.


Set aside to firm up.


Roll out a 1" size ball of chocolate fondant into a sausage and fold the end over to create the head.


Insert a toothpick into the other end and set into styrofoam.


Roll out a small amount of white fondant and cut two circles, using the #9 piping tube.


Roll out two tiny balls from chocolate fondant and place over white to create eyes.


With a 1/2" ball of yellow fondant, make a cone for the beak.

Afix eyes and beak to the head of the turkey.


Using the red buttercream with the #9 piping tip, pipe the turkey's wattle under the beak and to the top of one side of the beak as shown.


Pipe decorations onto the tail with the red and yellow buttercream using the #14 tip.


Crumb coat the cupcakes. Using the #14 tip, pipe chocolate buttercream stars over the cupcake.


Set tail in place and build up stars on the back side to afix into place, then push head into cupcake.


Last, pipe wings over the sides, using chocolate, yellow and red buttercream.


Here is the "glammed up" version.


Instead of colors, simply use chocolate buttercream , gold dragees for the eyes and tail, and highlight the wattle with gold luster dust.


****


Tutorial and Photos by Jacque Benson, 2009, all rights reserved.


This material may not be republished or reproduced in any manner without the expressed permission of the author.

Monday, November 9, 2009

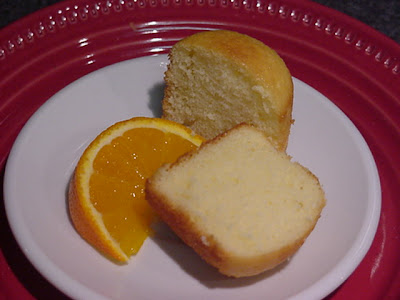
Mame's WASC Orange Cake


Mame’s WASC Orange Cake Creation

2 boxes Betty Crocker Yellow Cake mix with pudding
2/3 cup orange juice
2 cups water
2 cups flour
1-1/2 tsp. salt
2 cups sugar
5 eggs or 1-1/4 cups Eggbeaters
1/4 cup oil or 4 tbsp. applesauce
1 cup sour cream
2-4 oz. containers orange yogurt
1 tbsp. orange extract or orange flavoring
1 tsp. vanilla extract
Zest of 1 orange

* Mix all ingredients until well blended for about 2 minutes
* Once blended add in orange zest; mix by hand
* Prepare cake pans – grease and flour
* Makes six 7-3/4” oval cake pans, or about 4-8 or 9” rounds
* Bake at 335° - original WASC says 325°, but that doesn’t work for me…plus I have to bake about 1 hour & 15 minutes at 335° or until toothpick tested


* Mame Recckio Wolfe – 09/06/09-all rights reserved
Photography by Jacque Benson 2009 All Rights Reserved
This material may not be republished or reproduced in any manner without the expressed permission of the author.

Search This Blog

The Tutorials This Week Were Generously Shared by

RHONDA CHRISTENSEN, EARLENE MOORE, BOBBIE NOTO, EDNA DE LA CRUZ & TONI BRANCATISANO

And to ALL of our Readers...

Above all, have fun and keep baking!

Think CHOCOLATE!

A Very Sweet Tutorial by Bobbie Noto

A Very Sweet Tutorial by Bobbie Noto
I was instantly in love when Bobbie Noto shared this cookie with SugarTeachers! She is an amazing talent. For instructions on how to create this adorable cookie, click on the photo and don't forget to subscribe to Bobbie's website!

Pillow Cake Tutorial by Toni Brancatisano

Pillow Cake Tutorial by Toni Brancatisano
How beautiful! A great tutorial shared byToni Brancatisano. Click on photo to see the tutorial!

Pistachio-Cardamom Cake

Pistachio-Cardamom Cake
Click on link for Edna De La Cruz's dee-lish cake recipe.

Related Posts with Thumbnails